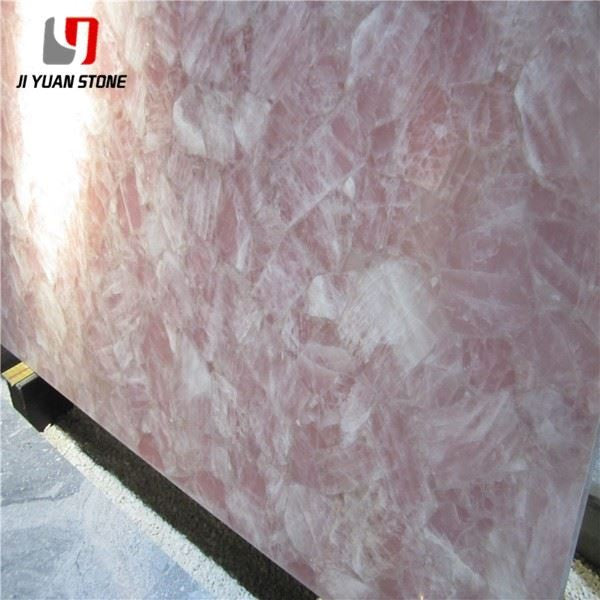
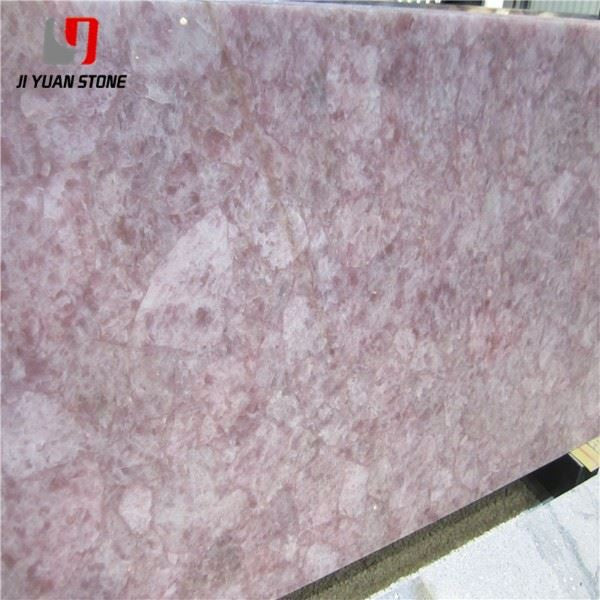
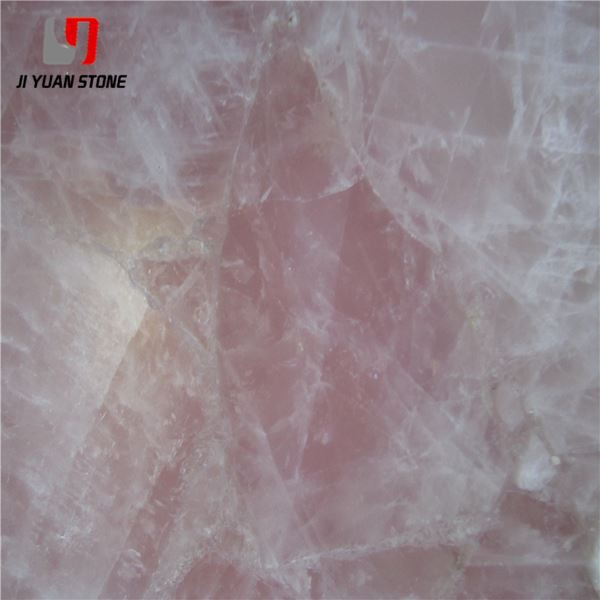
Rose Crystal Quartz Slab
Rose Crystal Quartz Slab
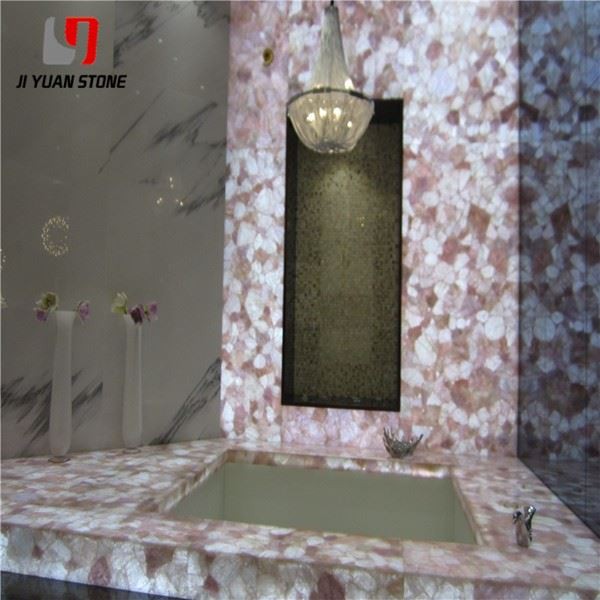
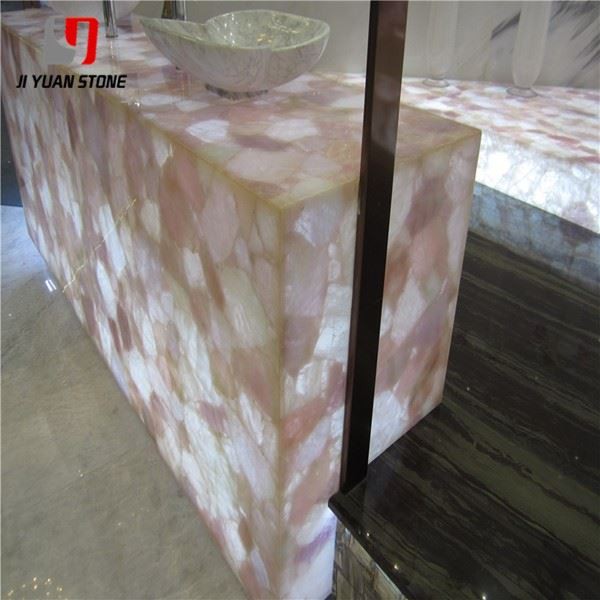
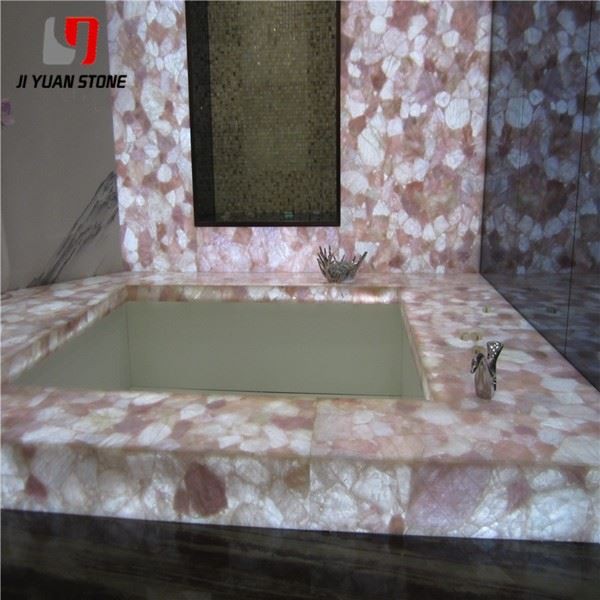
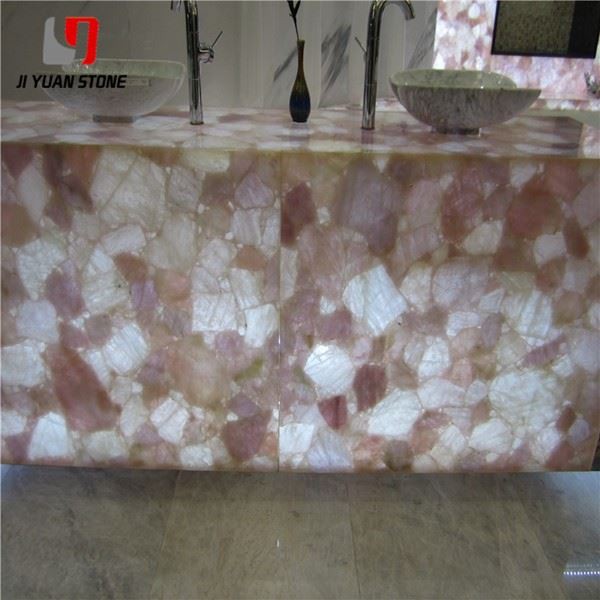
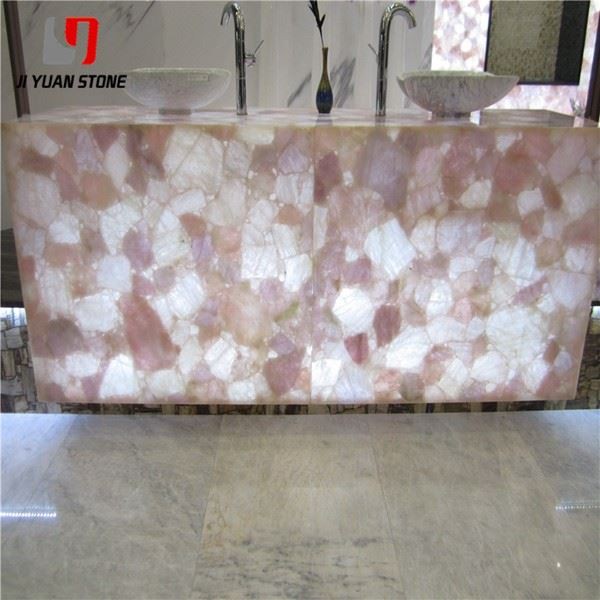
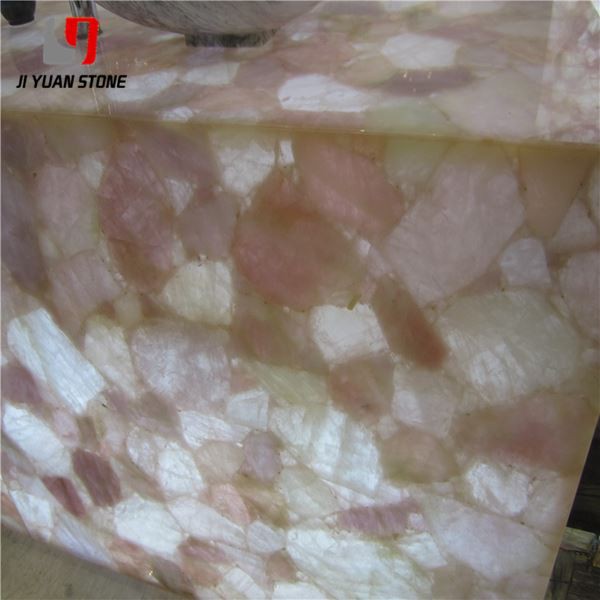
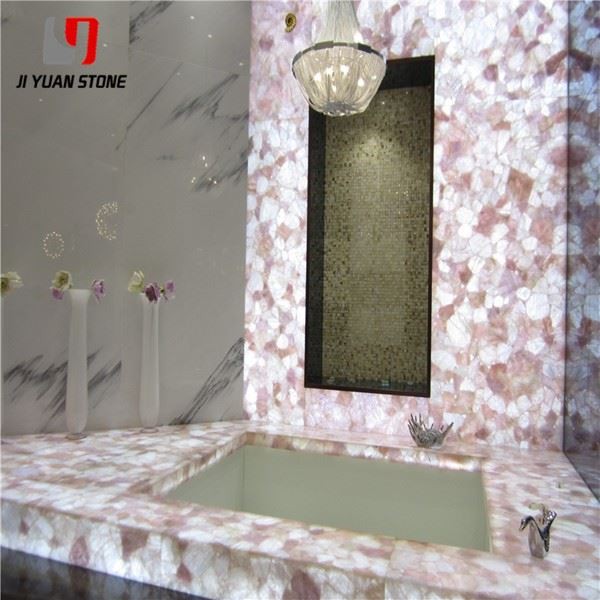
Rose Crystal Quartz Slab – Luxurious Beauty with Lasting Durability
Enhance your space with the natural beauty of our Rose Crystal Quartz Slab. With its stunning rose color and crystal clarity, it is the perfect addition to any interior design. Each slab is unique, providing a one-of-a-kind touch to your home. Made with high-quality materials, this slab is both durable and elegant.
| Feature | Details |
|---|---|
| Product Name | Rose Crystal Quartz Slab |
| Material | Pink Rose Agate Quartz |
| Surface Finished | Honed,Polished |
| Finished Products | Floor Tiles, Wall Cladding, Countertops, Windowsills, Special-Shaped Tiles, Small Slabs, Swimming Pool, Steps, Wall Panel, Flooring, Veneers, Slabs, Coping Tiles etc. |
| Color | Yellow,Black,White,Red,Purple Wood,Green,Grey,Pink,Rainbow,Pink,Tiger Eye etc |
| Material | 100% agate gemstone semi-precious stone |
| Size | Any sizes customized are welcome |
| Edge Available | Polished, Bush Hammer, Flat, Flamed, Eased, Beveled, Bullnose, Ogee, Cove, Dupont, laminated, non-laminated and etc. |
| Thickness | 10/15/18/20/25/30mm etc |
| Usage | Indoor/Outdoor Decoration, For floor or wall, Counter tops, Vanity tops |
| Packing | Seaworthy Wooden Crate |
Add a touch of natural elegance to your interior or architectural design with the stunning Rose Crystal Quartz Slab. Known for its soft pink hues and crystal clarity, this premium slab material blends timeless beauty with robust performance. Whether you're designing countertops, feature walls, or flooring, rose crystal quartz offers unmatched sophistication and natural charm.
Common Issues and Solutions for Rose Quartz Slab Installation and Maintenance
To ensure the long-term integrity and aesthetic appeal of your rose crystal quartz slab, it’s crucial to address common installation and maintenance challenges. Here’s how to avoid typical problems and apply expert solutions.
1. Incomplete Bonding Layer Compaction
Improper compaction of the mortar bonding layer can lead to poor adhesion between the slab and the substrate. If the slab is not properly tapped during installation, gaps may form, eventually causing lifting or detachment. Always ensure firm compaction and tap the slab thoroughly for a secure, long-lasting bond.
2. Maintenance Period Precautions
During the curing period, newly installed slabs must be protected from foot traffic or heavy loads. Premature use can disturb the setting process, resulting in hollow or loose areas. It’s essential to allow adequate curing time to ensure full bonding and structural integrity.
3. Environmental and Seasonal Factors
Temperature fluctuations can significantly impact slab installation. If cement mortar hasn’t fully dried before a cold snap, trapped moisture can weaken adhesion. On the other hand, sudden heat can cause thermal expansion, forming voids beneath the slab. This may lead to detachment, particularly around edges, which often emit a drum-like sound when tapped—an indicator of hollowness.
How to Detect and Repair Hollow Areas
To check for hollowness, lightly tap the surface. A hollow sound, especially around slab edges, signals separation from the base. Here’s how to fix it using expert materials and tools.
Tools and Materials for Repair
Materials:
- Low-viscosity epoxy resin
- Colorable marble glue (for sealing)
- Talcum powder (to adjust viscosity)
Tools:
- Electric mixer
- High-pressure grouting machine or spring syringe
- Hose & small spatula
- Hammer
Step-by-Step Repair Process
1. Drilling Holes
- Drill 5mm-diameter holes, 1.5× the slab thickness deep.
- For large hollow zones, drill holes approximately every 30 cm.
- Cool the drill with water to avoid overheating or damaging the slab.
2. Grouting Process
- Use the drilled holes to create air channels.
- Mix epoxy components A and B in a 3:1 ratio, stir thoroughly using a mechanical mixer.
- Add a diluent (acetone, xylene, or resin-specific thinner) to reduce viscosity if needed.
- Pour the resin mixture into the hollow using a high-pressure grouting pump.
- Tap around the area with a rubber hammer to assist in grout diffusion.
- Typically, 1.5–2.5L of grout per hole is sufficient for full coverage.
Why Choose Rose Crystal Quartz Slabs?
- Natural Elegance: Soft pink hues and crystalline textures bring warmth and serenity to any space.
- Durability: Resistant to wear, weather changes, and cracking when installed correctly.
- Versatility: Ideal for luxury interiors, including kitchen islands, vanities, and decorative wall panels.
- Easy Maintenance: With proper installation and care, these slabs offer long-lasting beauty.
Transform your home or commercial space with the radiant charm and structural strength of Rose Crystal Quartz Slabs. Shop now for premium quality stone and expert installation guidance to ensure a flawless finish every time.
Share