Backlit Semiprecious Stone Slabs
Backlit Semiprecious Stone Slabs
Backlit Semi-Precious Stone Slabs – Illuminate Spaces with Natural Elegance
Illuminate any space with our Backlit Semiprecious Stone Slabs. These stunning slabs are not only visually stunning, but also durable and long-lasting. With their unique backlighting feature, these slabs will add a touch of elegance and luxury to any room. Perfect for both residential and commercial spaces.
| Feature | Details |
|---|---|
| Product Name | Backlit Semiprecious Stone Slabs |
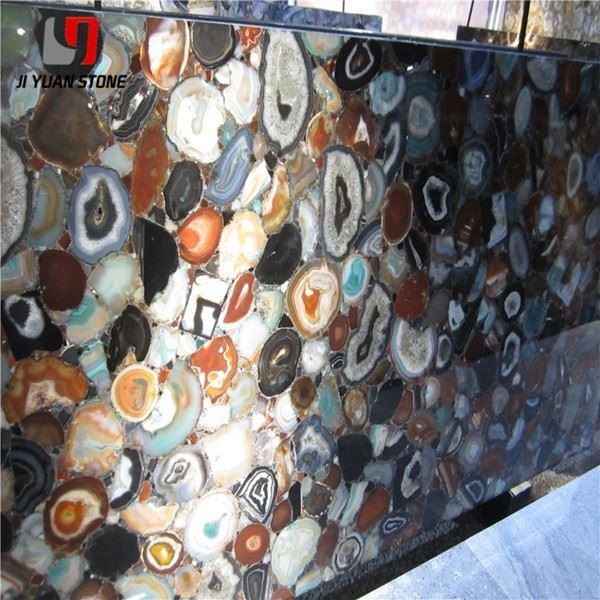
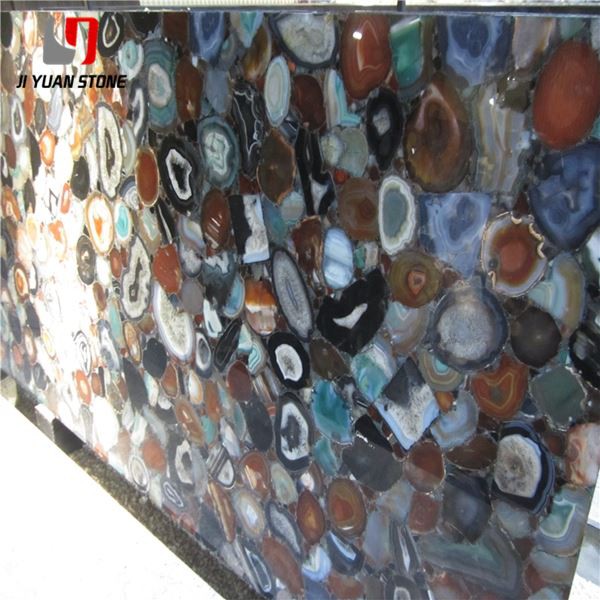
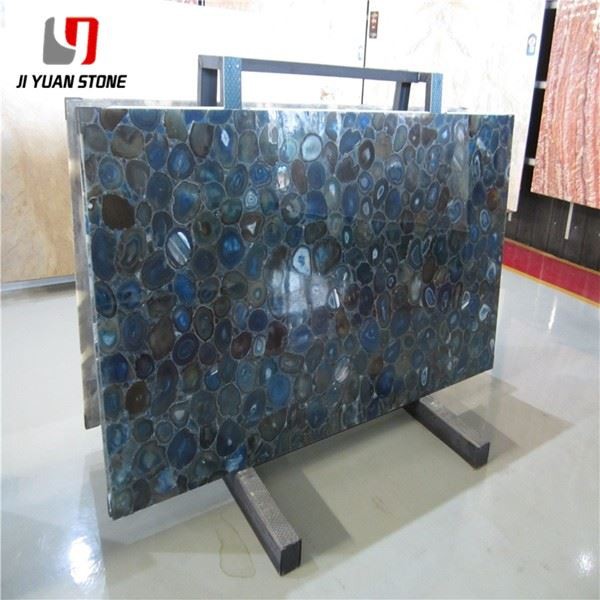
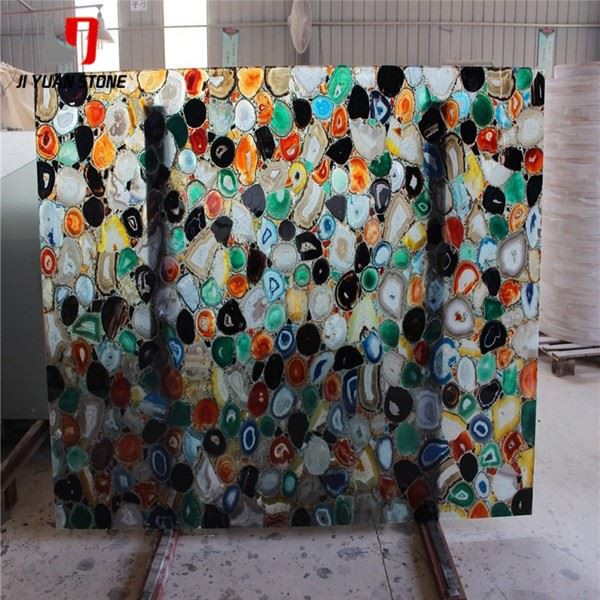
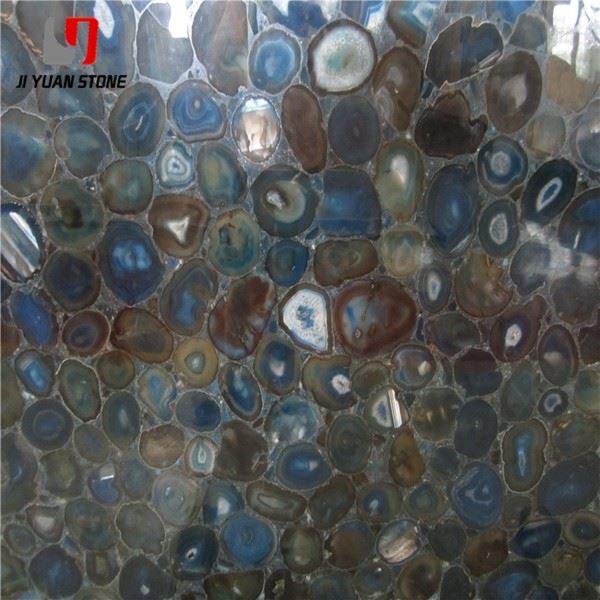
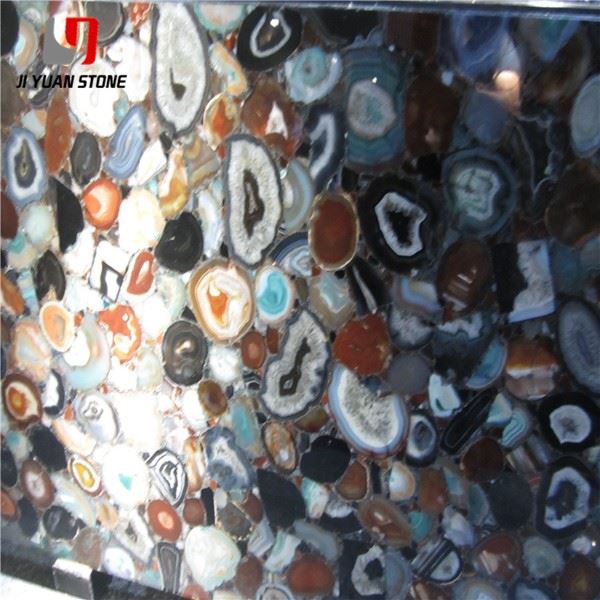
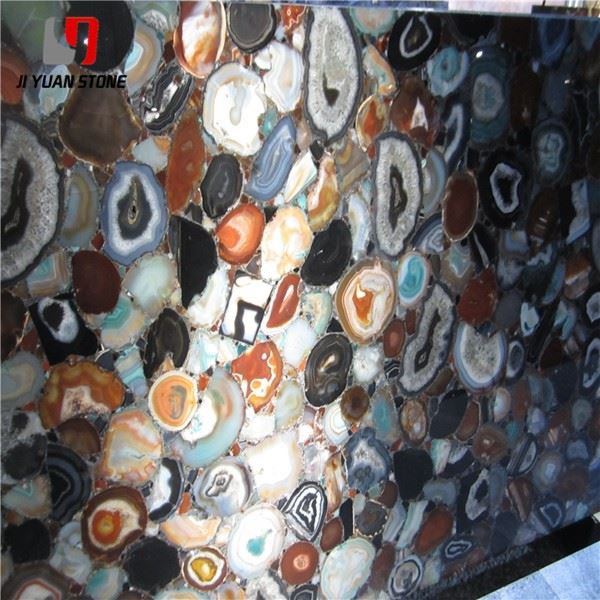
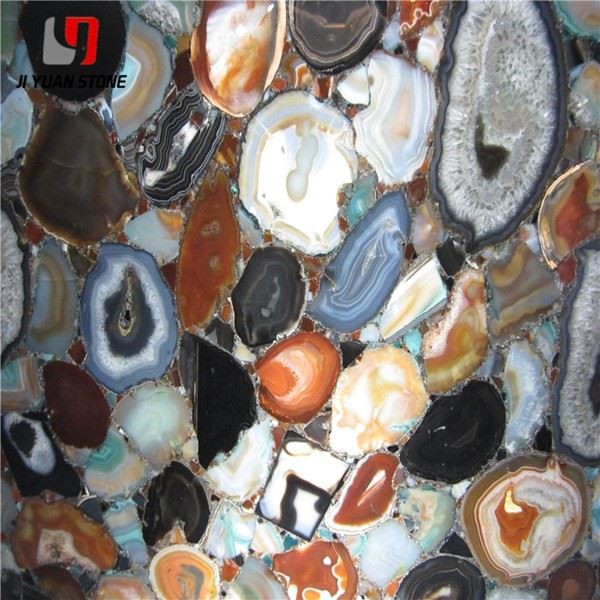
| Material | Agate Gemstone Semi-precious Stone |
| Surface Finished | Honed,Polished |
| Finished Products | Floor Tiles, Wall Cladding, Countertops, Windowsills, Special-Shaped Tiles, Small Slabs, Swimming Pool, Steps, Wall Panel, Flooring, Veneers, Slabs, Coping Tiles etc. |
| Color | Yellow,Black,White,Red,Purple Wood,Green,Grey,Pink,Rainbow,Pink,Tiger Eye etc |
| Slab Size |
|
| Size |
|
| Package Detail |
1) Slab: plastic inside + strong seaworthy wooden bundle outside 2) tile: foam inside + strong seaworthy wooden crates with reinforced straps outside 3) Countertop: foam inside + strong seaworthy wooden crates with reinforced straps outside |
Create mesmerizing interiors with our backlit semi-precious stone slabs, engineered to infuse spaces with luxurious translucency and radiant natural beauty. Crafted from rare semi-precious stones like agate, amethyst, and quartz, these slabs combine artistic design, natural brilliance, and high durability.
Ideal for walls, floors, feature panels, and counters, these slabs become even more stunning when illuminated from behind, offering a unique glowing effect that transforms any space into a high-end masterpiece.
🌟 Why Choose Backlit Semi-Precious Stone Slabs?
- Made from genuine semi-precious materials
- Perfect for artistic backlit installations in homes or commercial settings
- Available in a wide range of colors and translucent patterns
- Durable and moisture-resistant
- Compatible with both floor and wall mounting methods
🛠️ Installation Guide for Backlit Semi-Precious Stone Slabs
1.1 Ground Installation
Step-by-Step Process:
1 . Construction Preparation – Define the primary and secondary layout positions.
2 . Benchmarking – Identify key reference points for straight and level installation.
3 . Lay Dry Hard Cement Mortar – Use a dry mortar mix that holds its shape when pinched, with minimal water seepage.
4 . Apply Pure Cement Mortar – Spread on the back of the slab to ensure firm bonding.
5 . Installation – Carefully position each slab in place.
6 . Filling the Joints:
- Use black cement for dark stones.
- Use white cement for light stones.
- Avoid marble glue, which can stain the surface.
7 . Protection – After placement, apply mirror protection film or layer to maintain the polished surface.
⚠ Important Notes:
- If a glue net is tightly adhered to the back, do not remove it, as it may damage the slab or allow slurry to seep through, creating a cracked appearance.
- For loose glue netting, remove it prior to installation.
- In case of slurry seepage, wait two days and gently clean with a wallpaper scraper.
1.2 Wall Installation (Wet Paste Method – Indoor Use Only)
Ehxample: Installing 20mm thick slabs
Step-by-Step Process:
1 . Construction Prep – Drill and groove the surface for copper wire anchoring.
2 . Fixing Wires – Insert 18# copper wire or galvanized lead wire into pre-cut grooves and fasten to the wall.
3 . Add Steel Wire Mesh – Secure to increase structural integrity.
4 . Align Properly – Use ground wires and vertical hanging lines for perfect leveling.
5 . Install the Stone Slabs – Press slabs onto the wall one by one.
6 . Layered Grouting – Fill behind the stone in layers for enhanced adhesion.
7 . Surface Pointing & Rubbing – Final finish to clean and align grout joints.
⚠ Precautions:
Maintain a wet mortar layer of 20–30mm, depending on wall flatness.
For indoor white or beige stones, avoid general grouting as it may cause:
- Rust spots
- Color changes
- Efflorescence (salt deposits)
For dark stones, black cement can be used without issue.
💡 Perfect For:
- Backlit feature walls in hotels, lounges, and spas
- Statement floors with under-lighting
- Luxury washrooms and vanities
- Artistic commercial display areas
Add brilliance and style to your project with backlit semi-precious stone slabs—where natural elegance meets advanced lighting design and reliable construction practices ensure lasting impact.
Share